Tuesday, March 30, 2010

Flank Steak Marinade

This is a great Sunday dinner. You need to plan ahead because it needs to marinate for 3 days; then you just grill it. But, whenever I make it, all people want the recipe. Here is what you need:


Once again, my favorite garlic is needed!


Score the flank steak diagonally with a knife and poke several holes with a fork.


Put the olive oil, soy sauce, meat tenderizer, Worcestershire sauce, dry mustard, pepper, balsamic vinegar, parsley flakes and my beloved garlic in a zip-loc baggie. Mush it all together until it is mixed.


Put your flank in, seal it up and put it in the fridge. Marinate for 3 days, turning meat once a day. (I just flip the bag over every morning.)

Grill the steak to they way you prefer it (med., rare, etc.) Watch carefully, it doesn't take too much time.

The finished product!


Let me know how you like it!

xo,
Janette

P.S. I am sorry the pictures are so lame. I was having a hard day. Right before I left for church, I could smell gas in the guest bedroom. So, I called SDG&E, they came out just as I was leaving for church. They found the area of the leak, turned our gas off and told me to find a plumber. Off to church I went, came home, couldn't find a plumber and I had 8 people come for dinner. So, I made everything in the oven and very good boy Drew went to a friends house to grill the steak. Life can be crazy, can't it.

Flank Steak Marinade

1/2 c. olive oil
1/4 c. soy sauce
1 t. Adolf's Meat Tenderizer
1 T. Worcestershire Sauce
1 t. dry mustard
1 t. pepper
1 1/2 T. balsamic vinegar
1/4 c. parsley flakes
4 cloves garlic, crushed

Score the meat diagonally with a knife and poke several holes with a fork. Mix all ingredients in a gallon zip-loc baggie, add steak. Marinate for 3 days, turning meat once a day. Grill to the way you prefer the steak. Watch carefully, doesn't take too much time.

Monday, March 29, 2010

Pizza Sauce

When Gregg was in dental school, he sat by Scott Tardugno, who was a true blue Italian. One day Gregg asked him if he had a good pizza sauce recipe. Scott said his Grandma made the best pizza sauce in all of Italy. So, his buddy wrote the recipe down on a paper towel and gave it to Gregg. We have been making that sauce for the past 20+ years and I still use the recipe off of that paper towel to this day. This is a classic Chicago Italian pizza sauce, thick and spicy. Here are the main ingredients:


The best invention ever are the garlic squares from Trader Joe's. I have not chopped, diced, peeled or used a garlic press in years, I kid you not. The garlic comes frozen in this little box:


Inside are these cubes of fresh/frozen garlic. 1 cube equals on clove of garlic. They are the very best thing in the whole world!!!! I love them!!! If you don't live by a Trader Joe's, I will have a moment of silence and prayer that one opens near you soon. Back to the recipe.


Pour enough olive oil to cover the bottom of you skillet and heat it up.


Add your cloves of garlic and cook just until they start to brown but don't let them burn, that tastes nasty. Your garlic should look like this:


Add the tomato sauce and all of the spices and blend them together a bit.


Put a tight lid on your pan. Turn the heat to high and let the sauce boil (remaining covered the whole time) for 10 min. After 10 min., turn the heat down to low and let the sauce simmer for 1 hour.


After an hour, turn the heat off, open up your lid, stir the sauce, and there you have it; the best true blue Italian Pizza sauce in the whole wide world (according to my kids).


Yummy!

xo,
Janette

Pizza Sauce

Fill the bottom of a deep pan with olive oil. Cut-up 1/4 head of garlic and put it in with the oil. Heat it up until garlic is slightly brown. Put in 5 small cans of tomato sauce. Add 2 t. of: pepper, oregano, salt, basil, and garlic powder. Boil for 10 minutes and let simmer for 1 hour.

Friday, March 26, 2010

Homemade Bread

This is my story about bread.

This is the sad bread.


This is the happy bread next to the sad bread. Now you can really see how sad the "sad bread" is.


I had the once happy bread in the oven rising. I had to leave to pick up Livy at tennis. I left Drew in charge, poor Drew. When the timer went off, Drew put the once happy bread into the oven. Drew noticed that the oven was only warm and that the panel said, "FA". Good boy Drew tried to call his Mom but no such luck because his crazy mom left her phone at home, as usual. So, good boy Drew, decided to leave the bread in the slightly warm oven.

When I got home I got that oven heating up again, who knows what came over that darn oven! I left the bread in for another 15 min. beyond the usual time with hopes it would rise, but no such luck, it was just destined to be sad, sad bread.

So, I made another batch to redeem myself and here you have many happy loaves of bread.


Next I decided to test the children and made them grilled cheese sandwiches on the sad bread. Good news, they still ate it! They said it didn't taste nasty but that it was just a bit heavier than usual.

That is the happy ending of my sad bread story.

xo,
Janette

P.S. Hi Rachel!

P.S.S. Let me know if you want me to put the recipe for the bread on the blog.

New Chicken Marinade and Snickerdoodles

Warmer weather means barbecue for dinner. So, I saw this marinade and thought I would give it a try for dinner.

I let the chicken marinade for 1/2 hour, then Gregg grilled it. It is an orange juice/wine based marinade. It turned out pretty off of the grill but it didn't have much flavor. It was just OK. I will stick to Ina's homemade barbecue sauce next time. But, it was fun to try something new.


I did make homemade ranch dressing, at the very last minute. It was good! I will have to take pictures and send you that recipe next time. It is from the Pioneer Woman, it was a big hit!

I have saved the best for the last: Snickerdoodles. For years my snickerdoodles have come out flat and runny; but not anymore! This is the 4th time I've used this recipe and every time the cookies are perfect. It by Tamara Morrison from our ward cookbook. Here you go:

First you combine 1 c. butter, 1 1/2 c. sugar and 2 eggs (see my nice pretty dark yellow fresh eggs!).


While that is creaming away, my buddy Claire Moore mixed together the sugar and cinnamon.


To the creamed mixture add: 2 1/2 c. flour, 1 t/ baking soda, 1/4 t. salt & 1 1/2 t. cream of tartar. Once that is blended, you put it in the fridge for 5 - 10 min. (It gives you a chance to clean up and get your pans out. Then make your little balls (thanks Ruth for the ice cream scooper). Claire rolled them in the cinnamon/sugar. They should look like this and if you don't own a silpat, call me . . . everyone must have some!


Bake them at 400 degrees for 8 - 10 min., until very lightly browned.


Mmmmmmm goodness!


Here we have Claire trying them out. So goooooood!


xo,
Janette

Snickerdoodles

Cookies:
1 c. butter
1 1/2 c. sugar
2 eggs
2 3/4 c. flour
1 t. baking soda
1/4 t. salt
1 1/2 t. cream of tartar

Beat butter, sugar and eggs until light and creamy. Sift together flour, soda, salt, cream of tartar. Stir flour mixture into butter mixture. Chill dough 5 - 10 minutes in refrigerator. Roll dough into 1" balls. Roll in coating.

Coating:
3 T. sugar
2 t. cinnamon

Mix together in a small bowl. Roll cookie dough balls in cinnamon/sugar mixture until well coated. Place on ungreased cookies sheet, leaving room for cookie to flatten out. Bake at 400 degrees for 8 - 10 minutes, or until lightly browned.

The biggest thing about making cookies is having your eggs and butter at room temperature, it makes a HUGE difference. Also, the silpat is the best because you just have to wipe your pans out when you are done. Sweet!

Wednesday, March 24, 2010

My Five Follower/Friends

Dear Five Followers/Friends,

I love you,
Janette

Sloppy Joe's ala Lynda

My good friend Lynda Dyer gave me this recipe. We used to make it for the missionaries zone luncheons and let me tell you, the missionaries, loved it, they loved us. I had a brief memory lapse and forgot to make it the way Lynda did; so I will explain to you at the end. The ingredients are:


See those little Oro Wheat buns up there on the right? They aren't really buns, thin slices of something I didn't like. Don't buy those, stick to good old Ralph's brand buns.

Brown your hamburger, throw in the onions and cook them until clear.


Add everything else and blend it all together.


Here is where my memory lapsed, At this point we used to put it on the Crock pot at this point on low for 1 or 2 hours because we were setting up for the lunch. So, last night I just cooked it on the stove for 30 min., and it wasn't the same. Here is what mine looked like, so sad but I didn't tell "the people", they ate it anyways! Ha!


Here is a sloppy Joe on the sad little spongy bread that is supposed to be some sort of bun, not true! I LOVE cheese on it though!


So, if you put it in the Crock pot for a bit, it breaks down the meat and sauces a bit more; giving it a better flavor and texture. I highly recommend doing that. You could even make this in the morning, then put it in the crock pot a few hours before you want to eat! Super!

xo,
Janette

Lynda's Sloppy Joe's

1 lb. ground beef
medium onion, chopped
3/4 c. barbecue sauce
1/2 t. salt
1/4 t. pepper
6 oz. tomato paste
2/3 c. water.

Brown ground beef, add onion. Add rest of ingredients. Cook in Crockpot on low for 1 - 2 hours or have a memory lapse like me and cook it in the skillet for 30 min., and it is tastes more like chili with barbecue sauce.

Tuesday, March 23, 2010

Chicken Enchiladas

This best thing about making enchiladas is you can make one for dinner and freeze one for later. Sweet! This is my Aunt Bette's recipe. I have heard that Abby's are super good. I am going to try to get her to put it on this old blog as soon as Morgan Jean teaches me how to add people's names. (I forgot how, sorry Morgan . . .)

Here is what you need:

Combine the soup, sour cream and the fire roasted green chilies (they are my peoples favorite, they are gooood!):

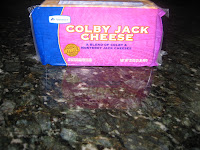

Next, grate your Colby/Jack cheese:


Here is my little chicken. Tear off all the meat and shred it to smithereens (sp?):

alt=""id="BLOGGER_PHOTO_ID_5451983790706698210" />

Slice up your green onions, get your tortilla (mine are in the back), the soup mixture, the cheese and your shredded chicken. You are ready to assemble:


So, put a dollop of soup on your tortilla, add chicken, cheese and some green onion. I fill my tortilla up, I like them full of goodness.


I am type A, I like my tortillas to be uniform and perfect, this trait can be very burdensome sometimes but what can you do.


Spread the rest of the soup/sour cream/green chilies all over the top of your lovely enchiladas.


Sprinkle lots and lots of cheese over the top.


Bake 350 degrees, 30 minutes or until golden brown, bubbly and to die for!


Happy Fiesta,
xo,
Janette

Chicken Enchiladas

4 chicken breasts or 1 roasted chicken, shredded
12 corn tortillas
1 bunch green green onions, sliced
1 lb. Colby Jack Cheese, shredded
2 c. sour cream
2 cans cream chicken soup
2 - 4 oz. green chilies (fire roasted are excelente)

Mix together sour cream, soup and green chilies in a bowl. Shred chicken, slice green onions, grate the cheese and warm the tortillas. Smear a little sauce on the tortilla, add chicken, cheese and onions. Roll and place in 9 x 13. Smear soup all over the top, sprinkle the rest of the cheese on top of that. Bake 350 degrees, 30 min. or until bubbly and golden brown.

Fried Chicken

This is probably Gregg's favorite dinner in the world. This recipe comes from my 1983 Betty Crocker cookbook. Gregg and I made it together when we were first married and have been making it ever since. Over the years the recipe has evolved into this:


First put about 1/2 c. flour, then dump Lawry's, Garlic Salt, Morton's Natural Seasoning and lots of pepper in a bowl. It is probably at least 2 t. or 1 T. of each. Except for the pepper, maybe only 1 t. Then mix it all together.


I cut my chicken breasts into 3 pieces and I try to keep them uniform in size, for easier cooking.


Coat them in the flour.

I fill the bottom of my skillet with oil and get it pretty hot but not super hot!


When I put the chicken in, I know it is the right temperature because I can hear the meat make a nice soft sizzles as it hits the pan and it starts bubbling on the edges of the chicken. (If your oil is too hot, it will start to burn the outside of your chicken too fast and the middle won't get done, so you want it hot but too hot, comprende?)

I keep the heat on about Medium and cook the chicken until it is slightly brown on both sides. It takes about 10 minutes, maybe a bit more on each side. I really go by color, so it should look like this:


Once both sides are a tiny bit brown, I put the lid on the pan, turn the heat to simmer (make sure it is hot enough that it is still cooking in there, sometimes it is a little higher). I leave the chicken covered to cook it thoroughly for at least 20 min.


Then I open my pan up and hopefully my chicken looks nice and brown. Then I turn the heat up a tiny bit and let it brown a little bit more. Sometimes I turn the chicken over and let the other side brown more if I need too.


Tonight I was in a hurry to get Gregg some dinner and make it to a fireside; so I got it all done in 40 min., which is about right.

The kids and Gregg at the whole pan! Finger Lick'n good.

xo,
Janette

Friday, March 19, 2010

Today's Work

So, today I decided I had to put our garden in. Here is what my old, dead winter garden looked like when we started:


Name the plant that never dies at the back of the bottom raised bed!


Here are 6 bags of compost, Wilson snuck in the photo. Crazy dog!


Wilson was rolling around on the grass trying to scratch his back, see I told you he was crazy.


Here is my wagon with all of my gardening gear.


These are a few of my soon to be in the ground plants. There are 8 tomato, 2 celery, 3 garlic, 2 cilantro, 1 Kale and 1 cabbage (for Cleo of course), 1 strawberry (Livy wanted that), then I still have to plant some from seed. To be done after Spring Break, hopefully.


Gregg made me another planter. I tore out a rosebush and a much disliked daylily plant to make room for 1 more. I will always need 1 more!


Livy came out to help and good 'ol Mr. Wilson just sat right on her lap.


The kids finally got home from the beach to help dig up the last bed, spread the mulch around and plant. They wished they hadn't come home so soon from the beach. Ha, fooled them.

The final garden!


I love pretty dark dirt.


I love tomatoes!


I love my fresh herbs.


I still love tomatoes, 8 might not be enough. . .


Tada! Now I must go take some Advil so I can move my pathetic, sliding into 50 body tomorrow.

xo,
Janette